Discover the joy of creating these irresistible Butterfinger Balls that combine creamy peanut butter with crunchy candy flavors. These bite-sized treats offer perfect texture contrast and satisfy sweet cravings effortlessly. Whether preparing holiday treats or simple desserts, this no-bake recipe delivers crowd-pleasing results every time.

Why You’ll Love This Easy Candy Recipe
Candy lovers appreciate how quickly Butterfinger Balls come together. Unlike complicated desserts, this recipe requires minimal tools and offers forgiving preparation. With just six ingredients and no oven needed, you can create professional-looking chocolates perfect for celebrations.
Family members of all ages enjoy helping with the dipping process, making this an excellent activity for special occasions. Parents particularly value how easily these treats store and transport – ideal for classroom parties or bake sales.
Many people find that creating homemade versions of their favorite candy bar flavors feels particularly rewarding.
These energy-packed morsels complement various other treats on dessert tables. If you enjoy peanut butter desserts, you might love pairing them with our cranberry pecan chicken salad for a sweet and savory combination.
Perfect For Special Occasions
From holiday cookie exchanges to birthday celebrations, these chocolate-covered delights add festive flair to any dessert spread. The glistening chocolate coating and colorful candy pieces create visual appeal that rivals bakery confections.
Recipe
Print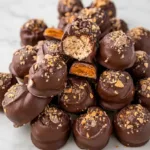
Butterfinger Balls
- Total Time: 1 hr 30 min
- Yield: 34 servings 1x
Description
Crunchy peanut butter centers coated in smooth chocolate, perfect for holiday gifts and parties
Ingredients
- 1⅓ cup creamy peanut butter (340 g)
- ½ cup salted butter, softened (115 g)
- 1 teaspoon vanilla extract
- 2 cups powdered sugar (240 g)
- 1½ cups crunchy candy bits (180 g), plus extra for topping
- 3 cups chocolate melting wafers (510 g)
Instructions
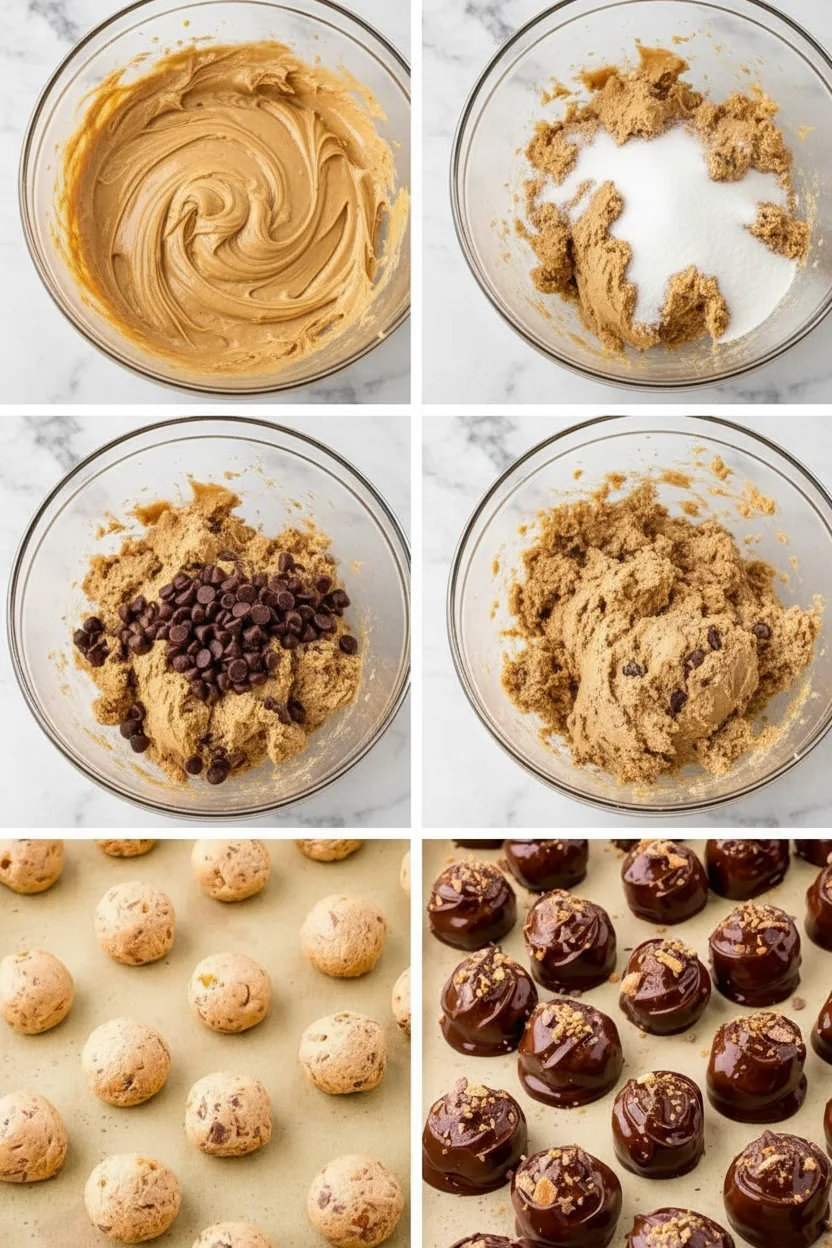
- Add peanut butter, butter, and vanilla to large bowl and cream together 30 seconds
- Sift powdered sugar into bowl and beat until smooth
- Mix candy bits into mixture until incorporated
- Chill mixture in refrigerator 30 minutes
- Line cookie sheet with parchment paper
- Portion mixture with cookie scoop, roll into balls
- Place balls on sheet and chill in freezer 20-30 minutes
- Melt chocolate wafers in microwave at 30-second intervals, stirring between each
- Dip chilled balls in melted chocolate using fork
- Place coated balls on parchment paper
- Sprinkle extra candy bits on tops
- Let chocolate set completely before serving
Notes
- Ensure peanut butter and butter fully combine to prevent separation
- Freeze shaped balls at least 20 minutes for easier dipping
- Store finished candies in airtight container up to 1 week
- Double batch for parties or holiday gift giving
- Prep Time: 30 min
- Category: Main Course
- Method: Baked
- Cuisine: American
Nutrition
- Calories: 210 kcal
- Sugar: 21 g
- Sodium: 73 mg
- Fat: 13 g
- Carbohydrates: 24 g
- Fiber: 1 g
- Protein: 3 g
Ingredients and Substitutions
Base Components
- Creamy peanut butter (1⅓ cup / 340 g) – creates the smooth foundation
- Salted butter, softened (½ cup / 115 g) – enhances richness
- Pure vanilla extract (1 teaspoon) – adds warmth
- Powdered sugar (2 cups / 240 g) – provides structure
Crunchy Elements
- Crunchy candy bits (1½ cups / 180 g plus extra for decoration) – delivers signature texture
- Chocolate melting wafers (3 cups / 510 g) – ensures smooth coating
Ingredient Swaps
For different dietary needs, consider these substitutions without compromising texture. Almond butter works instead of peanut butter, while dairy-free chocolate and plant-based butter accommodate vegan preferences. Replace crunchy candy bits with crushed pretzels or toasted nuts for alternative crunch.
How to Make Butterfinger Balls
Step 1: Prepare the Filling
Combine peanut butter, softened butter, and vanilla in a large mixing bowl. Beat for 30 seconds until completely smooth and creamy.
Step 2: Incorporate Dry Ingredients
Sift powdered sugar into the mixture to prevent lumps. Mix thoroughly until the dough becomes thick but workable. Fold in the crunchy candy bits until evenly distributed.
Step 3: Chill and Shape
Refrigerate the dough for 30 minutes until firm enough to handle. Portion with a cookie scoop and roll into smooth balls. Freeze for 20-30 minutes to harden before dipping.
Step 4: Chocolate Coating
Melt chocolate wafers using 30-second microwave bursts, stirring between intervals. Dip chilled balls completely using a fork, letting excess chocolate drip off.
Step 5: Decorate and Set
Immediately sprinkle reserved candy bits on top before the chocolate hardens. Allow finished candies to set completely at room temperature.
Pro Tips for Success
Follow these expert suggestions for picture-perfect results. First, measure peanut butter properly by stirring it thoroughly before spooning into measuring cups. Next, chill your mixture adequately between steps – this prevents misshapen candies during dipping. Finally, work quickly when coating to maintain chocolate fluidity.
For perfectly round shapes, roll portions between your palms using light pressure. If the dough becomes sticky, dust hands lightly with powdered sugar rather than adding more to the mixture. Maintain consistent ball sizes using a cookie scoop for uniform appearance and even setting times.

Flavor Variations
Customize these sweet treats with creative flavor twists. Mix in mini chocolate chips for double chocolate impact, or substitute caramel bits for different sweetness profiles. For seasonal appeal, incorporate orange zest during fall or crushed peppermint candies in winter.
Create colorful variations using different candy coatings like white chocolate or candy melts tinted with food coloring. These make excellent additions to holiday dessert platters alongside other festive dishes like our stuffed pepper casserole for savory balance.
Serving Suggestions
Pair these chocolate delights with complementary dishes for complete dessert presentations. Arrange them alongside fresh fruit platters for color contrast, or serve with coffee and tea at brunch gatherings. For party menus, consider including lighter fare like our refreshing strawberry spinach salad to balance sweetness.
Storage and Freezing Instructions
Room Temperature Storage
Store finished candies in airtight containers at room temperature for up to one week. Separate layers with parchment paper to prevent sticking.
Freezing Guidelines
Freeze undipped balls for up to three months in freezer-safe bags. Dip frozen balls directly into melted chocolate without thawing for fresh results.
Chocolate Maintenance
If chocolate becomes too thick during dipping, stir in teaspoon of coconut oil to restore fluidity. Always keep melted chocolate away from moisture to prevent seizing.
Nutrition Facts per Serving
| Calories | Fat | Carbs | Protein | Fiber | Sugar | Sodium |
|---|---|---|---|---|---|---|
| 210 | 13 g | 24 g | 3 g | 1 g | 21 g | 73 mg |
FAQs About Butterfinger Balls
Can I use natural peanut butter?
Regular peanut butter works better than natural varieties because its consistent texture helps maintain shape.
How do I prevent chocolate bloom?
Avoid temperature fluctuations during storage. Keep finished candies away from heat sources and refrigerators.
Can I make these gluten-free?
Yes, simply verify all ingredient labels for gluten content – many candy pieces contain gluten.
Why did my mixture become crumbly?
Add teaspoon of milk if dough becomes too dry. Over-measuring powdered sugar causes this issue.
How far in advance can I make these?
Prepare up to one week ahead. The flavors actually improve slightly after 24 hours.
Final Thoughts
These delightful Butterfinger Balls offer an ideal balance of simplicity and indulgence. With straightforward techniques and common ingredients, anyone can create impressive homemade candies.
The crunchy peanut butter centers enrobed in smooth chocolate provide textural contrast that makes this recipe stand out.
Consider doubling the batch for holiday gifting or bake sales since they store beautifully and transport effortlessly.
Whether making cherished family treats or edible party favors, these crowd-pleasing confections deliver sweet satisfaction with every bite.
Enjoy creating memorable moments in the kitchen with this foolproof candy recipe that keeps everyone coming back for more.