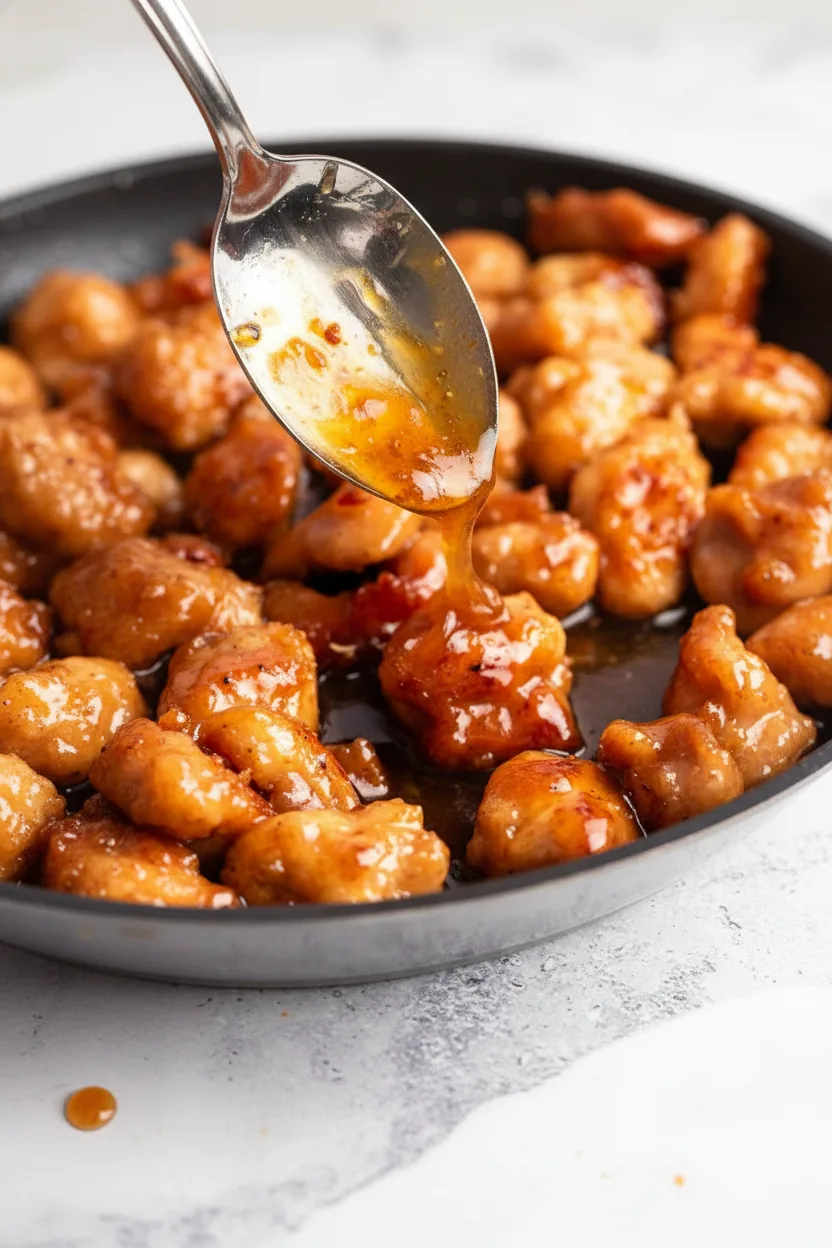
Imagine golden chunks of juicy chicken coated in a sticky honey butter glaze with just the right touch of garlic. This honey butter chicken recipe creates the perfect balance between sweet and savory flavors while delivering that crave-worthy crispy texture everyone loves. Better yet, you only need 30 minutes from start to finish to make this satisfying meal.
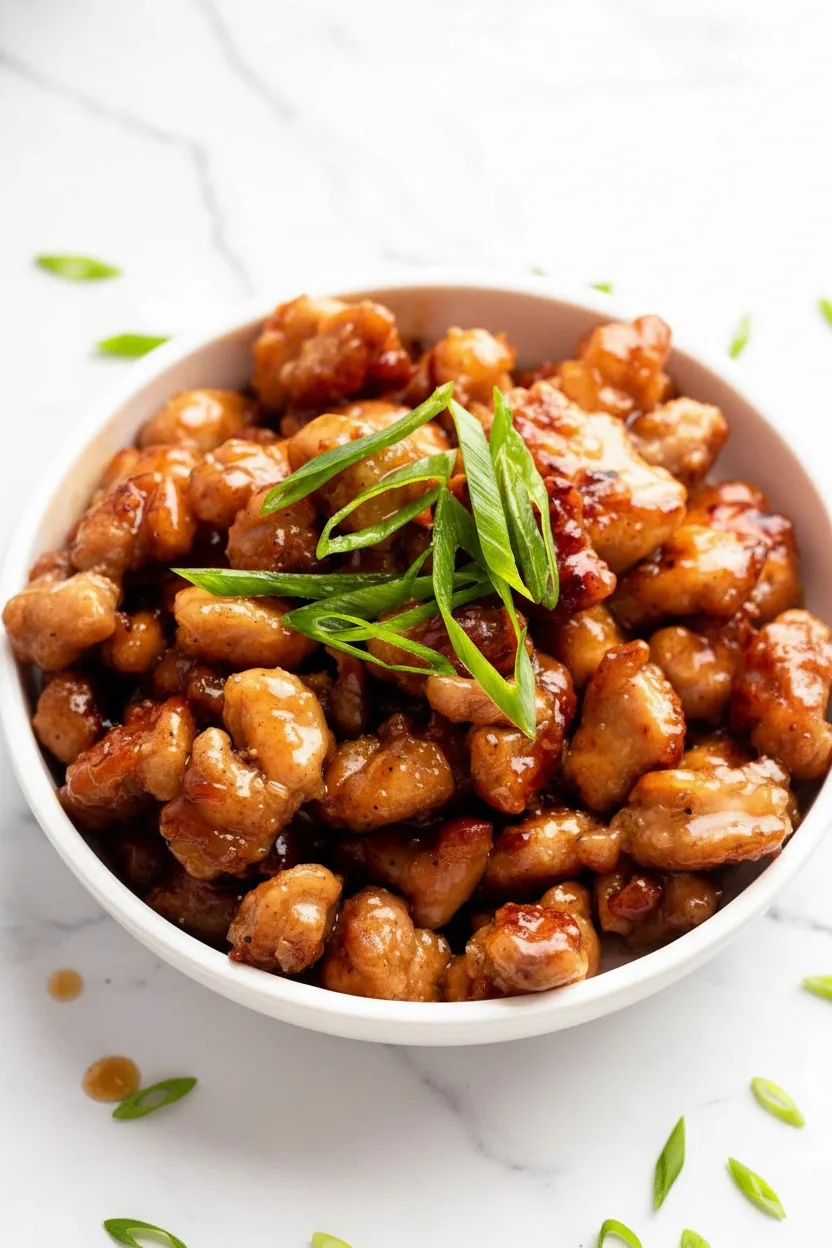
Whether you’re cooking for busy weeknights or hosting a casual gathering with friends, this dish always earns rave reviews. Its simple preparation makes it accessible for beginners, while its complex flavors satisfy even the pickiest eaters. While the chicken cooks to crispy perfection in the pan, the sauce comes together in minutes, creating a glossy coating that clings beautifully to every tender bite.
Why You’ll Love This Honey Butter Chicken
Several factors make this recipe stand out from other chicken dishes. First, the combination of honey and butter creates a luscious sauce that perfectly complements the savory garlic notes. Additionally, using chicken thighs ensures juicy results every time, though you can easily substitute tenders or breasts if preferred.
Another great feature is the adaptable cooking method. While we recommend pan-frying for maximum crispness, you could try baking the chicken for a slightly lighter version.
Whatever method you choose, the sauce consistently delivers its signature sweet and rich flavor profile. If you enjoy garlic-forward dishes like our garlic ginger broth chicken, you’ll appreciate how the minced garlic enhances this recipe.
Family Friendly Flavor
Kids particularly love the sweetness of this dish, making it an excellent option for family dinners. The familiar flavors help introduce younger eaters to more complex seasonings without overwhelming their palates. Plus, the bite-sized pieces make eating easier and more fun for small hands.
Recipe
Print
Honey Butter Chicken – Sweet & Crispy Bites
- Total Time: 30 min
- Yield: 5 servings 1x
Description
Crispy chicken bites coated in a sticky sweet honey butter sauce with garlic undertones – ready in 30 minutes.
Ingredients
- 1.76 lb boneless chicken thighs or tenders (800 g)
- 2/3 cup all-purpose flour (85 g)
- 1 tsp kosher salt (6 g)
- 1/2 tsp black pepper (1 g)
- 1 tsp garlic powder (3 g)
- 3 tbsp olive oil (45 ml)
- 1/3 cup honey (80 ml)
- 3.5 oz unsalted butter (100 g)
- 2 garlic cloves, minced (10 g)
- 2 tbsp light soy sauce (30 ml)
Instructions
- In a large bowl, mix flour, salt, pepper, and garlic powder thoroughly.
- Coat chicken pieces evenly in the flour mixture, shaking off excess.
- Heat oil in a large skillet over medium-high heat.
- Cook chicken in batches until golden brown and crispy, about 4-5 minutes per side.
- Remove chicken and set aside on a paper towel-lined plate.
- Melt butter in the same skillet over medium heat.
- Add minced garlic and sauté for 30 seconds until fragrant.
- Stir in honey and soy sauce, simmering for 2-3 minutes until bubbly.
- Return chicken to skillet, tossing to coat evenly in sauce.
- Cook for 1 additional minute before serving hot.
Notes
- For crispier results, let coated chicken rest 5 minutes before frying.
- Substitute coconut aminos for soy sauce if needed.
- Garnish with sesame seeds or green onions for extra flavor.
- Prep Time: 10 min
- Cook Time: 20 min
- Category: Main Course
- Method: Baked
- Cuisine: American
Nutrition
- Calories: 639 kcal
- Sugar: 19 g
- Sodium: 1196 mg
- Fat: 44 g
- Carbohydrates: 33 g
- Fiber: 1 g
- Protein: 29 g
Ingredients and Substitutions
Base Components
Simple pantry staples create magic in this recipe. Quality ingredients make all the difference. Always select pure honey rather than flavored syrups for the best results. Fresh garlic provides better flavor than pre-minced versions, though you can use the latter in a pinch.
Chicken thighs work exceptionally well here because their higher fat content prevents drying out during cooking. However, chicken breasts or tenders make fine substitutes if you prefer white meat. For a vegetarian twist, try using cauliflower florets or tofu cubes. Adjust cooking times accordingly to prevent overcooking.
Sauce and Seasonings
The sauce relies on just four essential components. Using unsalted butter allows you to control the sodium level precisely. Soy sauce adds umami depth.
Light soy sauce works best. If avoiding soy, substitute coconut aminos or tamari. Remember that alternative sauces may alter the final color and saltiness.
Garlic powder in the coating enhances the fresh garlic in the sauce. For a deeper flavor profile, consider adding a pinch of smoked paprika or ground ginger to the flour mixture. If you prefer extra heat, a dash of cayenne pepper in either the flour or the sauce adds pleasant warmth.
How to Make Honey Butter Chicken
Step 1: Prepare the Chicken
Begin by cutting your chicken into uniform bite-sized pieces. Consistent sizing ensures even cooking. Pat the pieces dry with paper towels. This crucial step helps the flour coating adhere better. In a shallow bowl or plate, combine the flour with salt, pepper, and garlic powder. Mix thoroughly to distribute the seasonings.
Toss the chicken pieces in the flour mixture until fully coated. Shake off excess flour. Let the coated chicken rest for five minutes. This allows the coating to set. The resting period makes the crust crispier when cooked, similar to techniques used in our crispy stir-fry dishes.
Step 2: Cook to Crispy Perfection
Heat oil in a large skillet over medium-high heat. The oil should shimmer but not smoke. Working in batches if needed, add chicken pieces in a single layer without crowding. Crowding the pan steams rather than fries the chicken. Cook for 4-5 minutes per side until golden brown and crispy.
Transfer cooked chicken to a plate lined with paper towels to drain excess oil. Repeat until all pieces are cooked. Keep cooked chicken warm by tenting with foil.
Step 3: Create the Glaze
Pour out any remaining oil but don’t wash the skillet. Those caramelized bits add incredible flavor. Reduce heat to medium. Melt butter in the pan. Add minced garlic and sauté until fragrant, about 30 seconds. Stir in honey and soy sauce. Bring the mixture to a simmer. Cook for 2-3 minutes until slightly thickened.
The sauce should bubble actively and coat the back of a spoon. If it thickens too quickly, add a teaspoon of water to thin it. If it’s too thin, simmer a minute longer. Remember that the sauce will thicken more upon cooling.
Step 4: Combine Everything
Return all cooked chicken to the skillet. Gently toss to coat every piece evenly with the glaze. Cook for another minute to let the sauce cling to the chicken. Some pieces will look glossier than others. That’s normal. For extra stickiness, toss the coated chicken in the sauce for an additional 30 seconds off heat.
Pro Tips for Success
Several techniques can elevate your honey butter chicken from good to exceptional. First, maintain proper pan temperature. If the oil smokes during frying, reduce heat slightly. Conversely, if the chicken absorbs too much oil, increase the heat a notch.
Use tongs for flipping chicken pieces rather than a fork. Piercing the meat releases juices that can make the coating soggy. When making the sauce, grated fresh ginger adds a lovely zing if you enjoy that flavor profile. Finally, finish with sesame seeds or chopped scallions for visual appeal and texture contrast.
Flavor Variations
Sweet and Spicy Version
For those who enjoy heat, incorporate spicy elements. Add 1-2 teaspoons of sriracha or chili garlic sauce to the glaze mixture. You could also use hot honey instead of regular honey. Sprinkle red pepper flakes over the finished dish for extra kick.
Citrus Twist
Lighten the flavor with citrus notes. Stir 1-2 teaspoons of orange or lemon zest into the sauce. Top the finished dish with finely grated citrus peel. A squeeze of fresh lemon or lime juice just before serving brightens the entire dish beautifully.
Serving Suggestions
This versatile dish pairs well with numerous sides. Steamed rice or fried rice both soak up the delicious sauce wonderfully. For a lighter option, serve over cauliflower rice or alongside roasted vegetables. A crisp green salad provides refreshing contrast to the rich chicken. For complete meals, consider our healthy noodle recipes as accompaniments.
Garnish ideas include toasted sesame seeds, chopped green onions, or fresh cilantro leaves. These additions add color and complementary flavors. For extra richness, drizzle additional warm glaze over plated chicken before serving.
Storage and Freezing Instructions
Store leftovers in an airtight container in the refrigerator for up to four days. Reheat gently in a skillet over low heat to preserve crispness. Avoid microwaving, which makes the coating soggy. For longer storage, freeze cooked chicken in sauce for up to three months. Thaw in the refrigerator overnight before reheating.
When freezing, consider separating the chicken from the sauce if possible. This helps maintain better texture. You can also freeze uncooked coated chicken pieces before frying. Cook directly from frozen, adding a few extra minutes to the cooking time.
Nutrition Facts per Serving
| Calories | Fat | Carbs | Protein | Fiber | Sugar | Sodium |
|---|---|---|---|---|---|---|
| 639 kcal | 44 g | 33 g | 29 g | 1 g | 19 g | 1196 mg |
FAQs About Honey Butter Chicken
Can I make this recipe gluten-free?
Yes, replace regular flour with a gluten-free flour blend of your choice. Ensure your soy sauce is gluten-free as well. Coconut aminos work great for gluten-free diets.
How can I reduce the sodium content?
Use low-sodium soy sauce and omit added salt in the flour mixture. You could also substitute coconut aminos which typically contain less sodium than regular soy sauce.
What causes the sauce to become grainy?
Separation can occur if the heat is too high or if cold ingredients hit hot butter. Keep the sauce at a gentle simmer when combining ingredients. Remove from heat before adding to very hot pans.
Why did my chicken turn out soggy?
Crowding the pan during frying causes steaming instead of crisping. Work in batches giving each piece space. Ensure oil stays hot before adding chicken. Don’t toss sauce onto chicken too early.
Final Thoughts
This honey butter chicken recipe delivers restaurant-quality flavor with minimal effort. Its crowd-pleasing combination of sweet, savory, and garlicky notes makes it perfect for various occasions. Try it once and you’ll find yourself craving those crispy bites regularly. Enjoy experimenting with different variations to make it uniquely yours.