This Pavlova recipe is a showstopper a crisp, melt-in-your-mouth meringue topped with soft whipped cream and juicy berries. You don’t need fancy tools or a pastry degree, just patience, timing, and a touch of sweetness. Let’s make a Pavlova that’ll have everyone begging for seconds.
The Secret Behind Perfect Pavlova Meringue
There’s something almost magical about Pavlova. One moment, it’s just sugar, egg whites, and air the next, it’s transformed into a delicate, glossy dessert that crunches, then melts into creamy bliss. The secret? It’s all about balance, timing, and a few science-backed tricks that make this dessert work like a dream.
Why Pavlova Is So Special
Pavlova isn’t your average meringue. It’s got that crispy shell outside and a soft, marshmallow-like center inside a textural dream. What makes it special is how each ingredient has a purpose:
- Egg whites create the structure and volume.
- Sugar locks in stability and sweetness.
- Cornstarch keeps the center soft and pillowy.
- A touch of acid like cream of tartar or vinegar strengthens the foam so your Pavlova doesn’t collapse faster than your diet goals.
When whipped correctly, these ingredients turn into a glossy, stiff meringue that holds its shape beautifully in the oven. It’s light, airy, and a little dramatic just like dessert should be.
Essential Pavlova Ingredients You’ll Need
Here’s the lowdown on what goes into the perfect Pavlova recipe:
- Egg whites (¾ cup / about 6 large eggs): Room temperature is key. Cold whites don’t whip up as easily.
- Granulated sugar (1½ cups / 300 g): Adds structure and sweetness. Gradual addition is non-negotiable.
- Cornstarch (1½ tablespoons / 12 g): Keeps the inside chewy and soft.
- Cream of tartar (½ teaspoon / 2 g): Or you can go with white vinegar (2 teaspoons / 10 ml). Both stabilize the meringue.
- Vanilla extract (1½ teaspoons / 7 ml): Adds that beautiful aroma and flavor.
- Salt (a pinch): Brings out all the sweetness and flavor layers.
Each ingredient plays its part, and skipping one can turn your Pavlova from masterpiece to mess. Keep everything clean and grease-free even a tiny drop of fat can ruin your meringue’s rise.
You’re not just making dessert; you’re creating a sweet, edible cloud. And trust me, when it comes out of the oven white, crisp, and flawless, you’ll feel like a kitchen legend.
Recipe
Print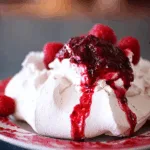
Pavlova
- Total Time: 80 mins
- Yield: 8 to 10 individual Pavlovas 1x
Description
A light, crisp, and chewy Pavlova topped with soft whipped cream and juicy berries. It’s airy, delicate, and unforgettable — perfect for every celebration.
Ingredients
- 1 ½ teaspoons (7 ml) pure vanilla extract
- 2 teaspoons (10 ml) white vinegar or ½ teaspoon (2 g) cream of tartar
- 1 ½ cups (300 g) granulated sugar
- 1 ½ tablespoons (12 g) cornstarch
- ¾ cup (6 ounces / 180 ml) large egg whites, at room temperature
- Pinch salt
- 2 pints (about 4 cups / 480 g) fresh or frozen berries
- ¼ cup (50 g) sugar
- 2 cups (480 ml) lightly sweetened whipped cream
Instructions
- Preheat oven to 275°F (135°C). Line a large baking sheet with parchment paper.
- Combine the sugar and cornstarch in a bowl; set aside.
- In a clean mixer bowl, beat egg whites, cream of tartar (or vinegar), and salt at medium speed until soft peaks form.
- Gradually add the sugar-cornstarch mix while beating on medium-high until glossy and stiff peaks form, 4–5 minutes.
- Fold in vanilla extract gently.
- Spoon or pipe mounds of meringue onto the lined baking sheet, 3 inches wide, with a slight dip in the center.
- Reduce oven to 250°F (120°C) and bake for 50–60 minutes until crisp on the outside and white all over.
- Turn off the oven and let Pavlovas cool inside with the door ajar.
- Once cool, lift carefully and store in an airtight container until ready to serve.
- To make the topping, heat berries and sugar in a pan for 5–10 minutes until saucy. Let cool completely.
- Top each Pavlova with whipped cream, berry sauce, and fresh fruits just before serving.
Notes
- Store baked shells at room temperature for up to 1 week in an airtight container.
- Avoid refrigeration before serving to maintain crispness.
- Use fresh fruits of your choice — kiwi, mango, or peaches add a fun twist.
- Add a few chopped nuts for crunch or a dusting of cocoa for a fancier touch.
- Prep Time: 20 mins
- Cook Time: 60 mins
- Category: Dessert
- Method: Baking
- Cuisine: Australian / New Zealand Inspired
Nutrition
- Serving Size: 1 Pavlova
- Calories: 133
- Sugar: 31g
- Sodium: 25mg
- Fat: 0g
- Saturated Fat: 0g
- Unsaturated Fat: 0g
- Trans Fat: 0g
- Carbohydrates: 31g
- Fiber: 1g
- Protein: 2g
- Cholesterol: 0mg
Step-by-Step Guide to Making Pavlova Like a Pro
Making a Pavlova isn’t about luck it’s about science, rhythm, and knowing exactly when to stop whisking (which, let’s be honest, is the hardest part). The good news? Once you understand the signs, it’s as easy as pie actually, easier than pie.
Whipping the Whites to Perfection
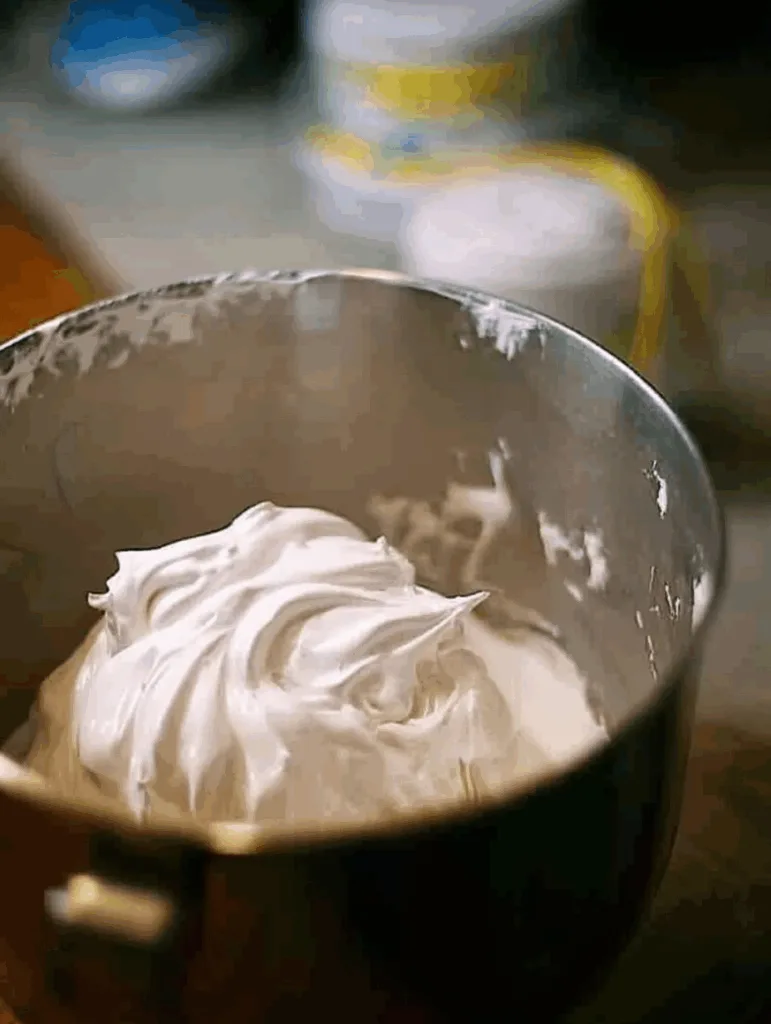
This is where your Pavlova’s destiny is decided. Start with your egg whites in a clean, dry bowl any trace of fat will sabotage the foam. Begin whipping at low speed to introduce air gently. After about two minutes, when soft peaks start forming, increase the speed to medium.
Now, grab your sugar-cornstarch mix and slowly sprinkle it in, a spoonful at a time. Patience pays here dump it in too fast, and you’ll deflate your hard-earned air. Keep the mixer going until you get stiff, glossy peaks that don’t flop when you lift the whisk. That sheen? That’s pure meringue pride.
Once your mixture holds its shape, add vanilla and either vinegar or cream of tartar (depending on your chosen stabilizer). This step locks everything in and prevents the dreaded “weeping” that ruins so many novice Pavlovas.
Quick tip: if you can flip the bowl upside down and the meringue stays put, you’ve nailed it. If it slides out, well… start over (and maybe eat the failed batch with a spoon no judgment).
Baking and Cooling Secrets
Now that your meringue looks like snow with an attitude, it’s time to bake. Preheat your oven to 275°F, then lower it to 250°F right after sliding in the tray. This gentle heat is what keeps your Pavlova snow-white and crisp, without cracks or color.
Line your baking sheet with parchment paper, and either pipe or spoon 8 to 10 round mounds about 3 inches wide. Use the back of a spoon to make a shallow dip in the center this will hold your dreamy toppings later.
Bake for 50 to 60 minutes until firm on the outside but soft and marshmallow-like inside. Don’t open the oven door mid-bake your Pavlova hates drafts. Once done, turn off the oven and let it cool inside with the door slightly ajar. This prevents cracking as it transitions from hot to cool air.
When cooled completely, your meringue should be crisp, shiny, and feather-light. It’ll practically whisper when you touch it. That’s when you know you’ve achieved Pavlova perfection.
And because we love dessert balance, check out the Mexican Wedding Cookies recipe for another crisp-meets-soft treat that melts like a dream.
The Fun Part — Pavlova Toppings and Variations
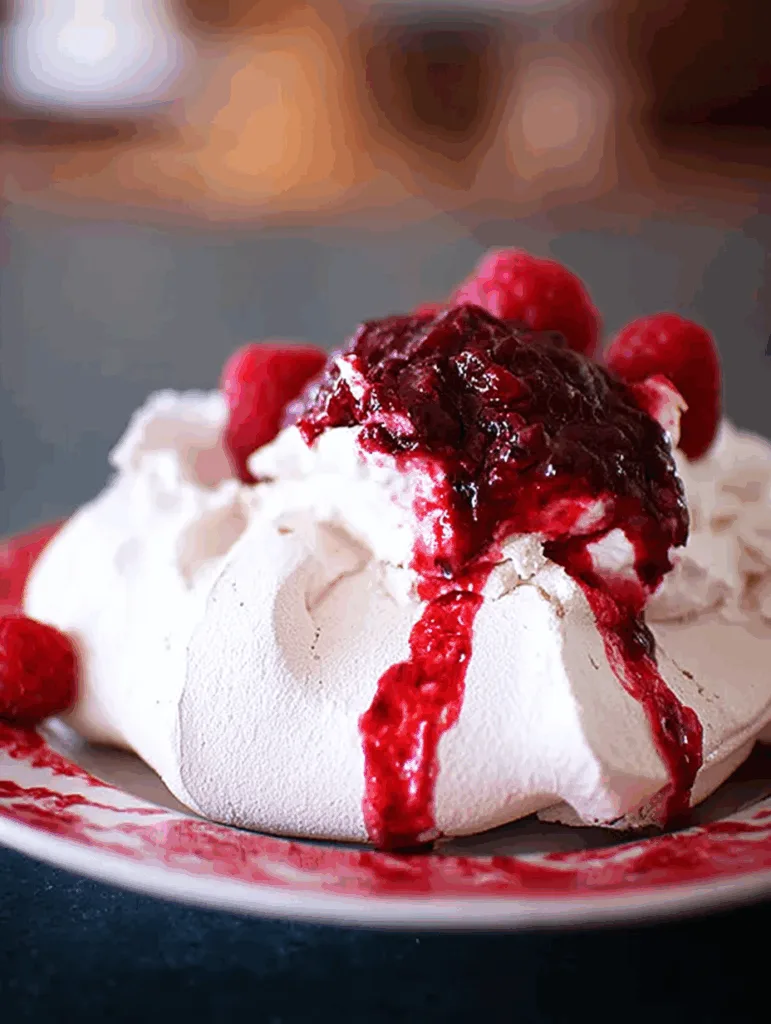
So you’ve baked your crisp, marshmallowy base. It’s sitting there, innocent and perfect, waiting for a crown of berries and cream. Here’s where the Pavlova transforms into the diva of desserts bright, juicy, and irresistibly dramatic.
Classic Berry Pavlova
The traditional Pavlova recipe topping is pure elegance: a cloud of whipped cream piled high and crowned with a medley of fresh or frozen berries. Strawberries, raspberries, and blueberries are the holy trinity here, but don’t stop there add whatever’s ripe, sweet, and vibrant.
To make a quick berry sauce, toss 2 pints of berries with ¼ cup sugar in a saucepan. Heat over medium flame for 5–10 minutes until glossy and jammy. Once cool, spoon it over your Pavlova and let it drip down the sides like sweet ruby lava. Add a few whole berries on top for that photogenic “I’m too pretty to eat” vibe.
And of course, don’t forget the whipped cream light, airy, and slightly sweetened. It balances the crisp meringue and tart fruit like a culinary symphony.
Creative Twists to Try
Once you’ve mastered the classic, it’s time to get playful. Pavlova is like a blank dessert canvas, ready for flavor experiments that’ll make your guests swoon. Try these fun combinations:
- Tropical Temptation: Swap berries for mango, kiwi, and passion fruit for a sunshine-bright finish.
- Chocolate Lovers’ Dream: Drizzle with melted chocolate or top with chocolate curls. The bitterness balances the sweet meringue beautifully.
- Citrus Burst: Spoon lemon curd or orange zest whipped cream into the center for a tangy twist.
- Nutty Crunch: Add roasted pistachios or slivered almonds for texture and extra flavor contrast.
And if you love light desserts that melt in your mouth, don’t miss Mexican Wedding Cookies they’re the crumbly cousins of Pavlova, perfect for tea time or gifting.
Each variation still keeps the essence of Pavlova: a sweet, crunchy, soft, creamy dream that looks like it came straight from a pastry chef’s playbook except you made it in your kitchen, like the dessert genius you are.
Serving, Storage, and Troubleshooting Tips
Let’s be honest Pavlova may look intimidating, but it’s surprisingly forgiving. Even if it cracks, caves, or gets a little sticky, you can still save it. With the right presentation, no one will ever know. Let’s make sure your Pavlova not only tastes divine but also looks like a glossy magazine cover on your dining table.
How to Serve Pavlova Beautifully
Serving Pavlova is all about timing and drama. You want to assemble it just before serving, so the whipped cream doesn’t soften the shell too soon. Start by placing your crisp meringue base on a serving plate. Spoon or pipe a generous layer of lightly sweetened whipped cream into the center, then top it with your cooled berry sauce or fresh fruits.
The trick to show-stopping presentation? Height and color contrast. Layer berries and cream in swirls, sprinkle a little powdered sugar, and maybe add a few mint leaves for that “I’m on a cooking show” finish.
If you’re prepping ahead for a big event, bake the meringue base a day early. Store it in an airtight container at room temperature, away from humidity. Avoid the fridge it’s the enemy of crispness. Once topped, Pavlova should be eaten within a few hours for the best texture and flavor.
And if you love serving gorgeous brunch-worthy sweets, check out our Almond Flour Chocolate Chip Banana Bread it’s hearty, naturally gluten-free, and pairs perfectly with coffee.
Fixing Common Pavlova Problems
So, your Pavlova cracked? Don’t panic you’ve just created a “rustic-style” dessert (and trust me, even professionals use that excuse). Here’s how to handle typical hiccups:
- Cracked Shell: Gently cover it with extra whipped cream or fruit. Instant disguise.
- Sticky Base: This means your kitchen was humid. Next time, bake slightly longer or store it in a drier spot.
- Weeping or Syrupy Meringue: Happens when sugar wasn’t fully dissolved. To fix it next time, add sugar gradually and whisk until the mixture feels smooth between your fingers.
- Flat Pavlova: You might have overwhipped your whites. Stop when peaks are firm but still shiny not dry or crumbly.
Remember, even the most “flawed” Pavlova still tastes heavenly. Presentation can fix almost anything, especially when you pile on extra whipped cream.
And if you enjoy recipes that mix comfort with a hint of finesse, don’t miss our Gluten-Free Cinnamon Rolls. They share Pavlova’s soft-centered charm but with a warm, doughy twist.
Finale
Congratulations you’ve just created the kind of dessert that makes jaws drop and forks fight. Pavlova isn’t just another meringue; it’s the edible version of elegance, fluff, and flavor harmony. Every slice tells a story crisp shell, creamy cloud, tangy fruit burst. It’s the kind of treat that wins hearts, celebrations, and Instagram feeds.
Whether it’s for holidays, birthdays, or those “I deserve something fancy” nights, this Pavlova recipe fits the bill. It’s naturally gluten-free, uses simple ingredients, and can be topped with anything from tropical fruits to chocolate curls. You don’t need to be a pastry chef you just need a whisk, patience, and a sweet tooth.
Want another dessert that’s just as photogenic and crowd-pleasing? Try our Easy Blueberry Sheet Cake it’s the perfect companion for your Pavlova adventures, bringing that same homemade magic to every bite.
So go ahead slice that Pavlova, grab a fork, and dig into your masterpiece. You’ve earned it.