Traditional Japanese comfort food often centers around the satisfying crunch of Chicken Katsu. This golden-brown delicacy typically requires deep-frying, but we have perfected a healthier, oven-baked version that preserves that iconic texture without the heavy oil.
By focusing on a specialized breading technique and high-heat roasting, you can enjoy a tender, juicy chicken breast encased in a perfectly crisp panko shell. This guide explores the secrets behind mastering this classic dish at home.
The Secrets to Achieving a Pre-Toasted Crunch
The biggest challenge with baked katsu is achieving a deep golden color without overcooking the meat. To solve this, we utilize a pre-toasting method for the panko breadcrumbs. By sautéing the panko in a small amount of butter or oil before coating the chicken, you ensure a vibrant color and a crunchy texture immediately upon hitting the oven.
This step eliminates the pale, soggy finish that often plagues baked chicken recipes.
Why Panko Matters
Japanese panko breadcrumbs differ significantly from standard breadcrumbs. They have a larger, flaky shape and a lighter consistency. These flakes provide more surface area for crisping and do not absorb as much moisture as fine crumbs, which keeps the coating light and airy. Using panko is non-negotiable for an authentic Chicken Katsu experience.
Proper Preparation: Pounding and Seasoning
Uniformity is key to perfect katsu. Evenly sized chicken cutlets ensure that every piece finishes cooking at the exact same time. We recommend lightly pounding the chicken to a half-inch thickness. This process breaks down connective tissues, resulting in a more tender bite.
Once pounded, seasoning both the meat and the breading layers creates a multidimensional flavor profile that shines even before adding sauce.
The Three-Step Dredging Station
To ensure the breading stays on the chicken rather than falling off on your plate, follow the standard breading procedure: flour, egg, and then panko. The flour dries the surface of the meat so the egg can cling to it; the egg سپس acts as the glue for the toasted panko.
Always shake off excess flour and egg to prevent the breading from becoming gummy.
Authentic Serving Suggestions
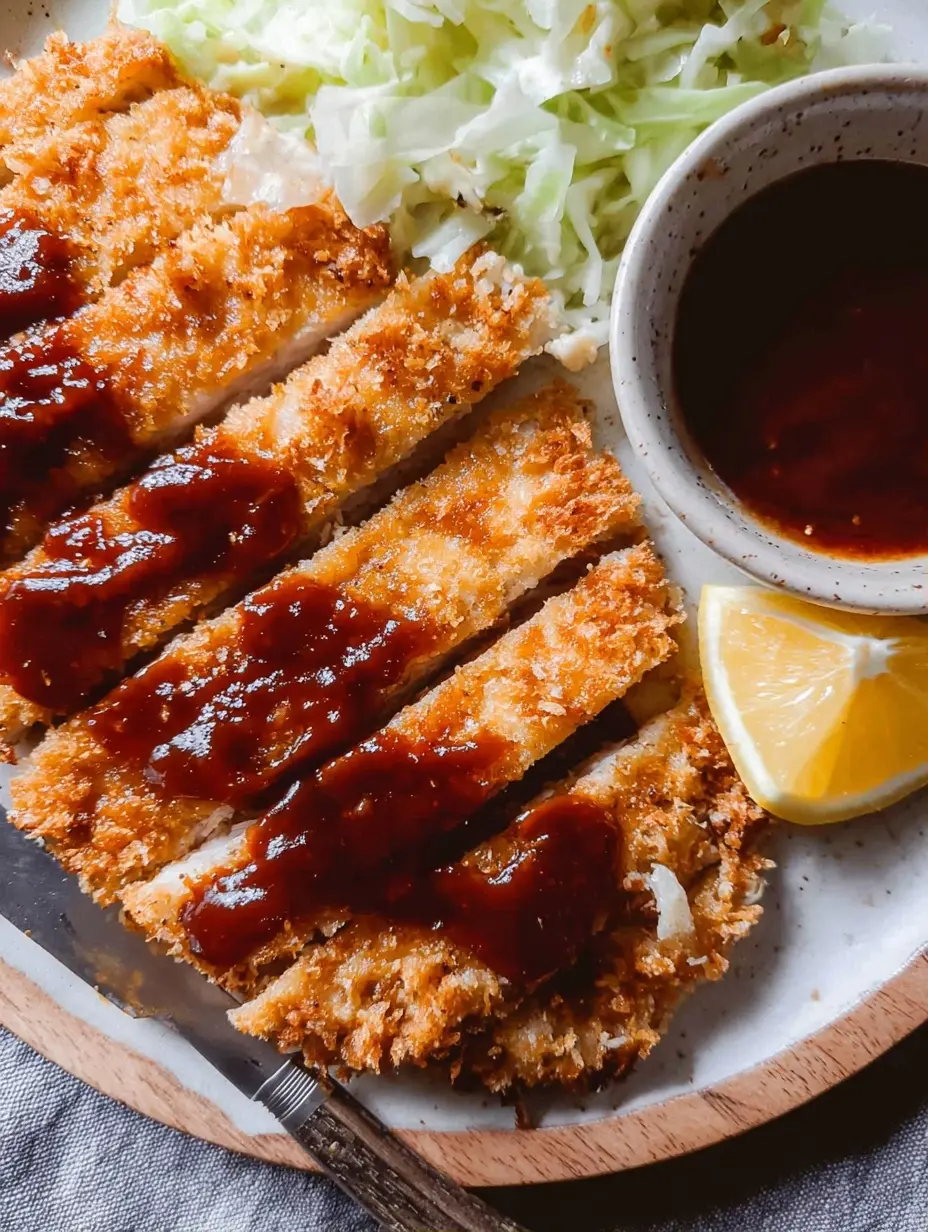
A traditional katsu meal is incomplete without its standard accompaniments. Thinly shredded green cabbage provides a refreshing, cool contrast to the hot chicken. A side of steamed white rice serves as the perfect base, and a generous drizzle of savory-sweet Tonkatsu sauce ties the entire dish together.
For a brighter finish, always include a fresh lemon wedge to cut through the richness of the breading.
Nutrition Information
This baked version significantly reduces the fat content compared to traditional deep-fried katsu while maintaining a high protein profile. Below is the nutritional breakdown per serving.
| Metric | Amount |
|---|---|
| Calories | 344 kcal |
| Total Fat | 12 g |
| Carbohydrates | 16 g |
| Protein | 41 g |
| Fiber | 1 g |
| Sugar | 1 g |
Step-by-Step Cooking Guide
First, preheat your oven to 425 degrees Fahrenheit. This high temperature is essential for crisping the exterior quickly. Use a rimmed baking sheet topped with a wire rack to allow hot air to circulate under the chicken, preventing a soggy bottom. Toast your panko in a skillet with butter until golden, then set up your dredging bowls.
Bake for roughly 12 to 14 minutes or until the internal temperature hits 165 degrees Fahrenheit. Let the chicken rest for five minutes before slicing to keep the juices locked inside.
Storage and Reheating
If you have leftovers, store them in an airtight container in the refrigerator for up to three days. To regain that crunch, reheat the chicken in an air fryer or a toaster oven at 350 degrees Fahrenheit. Avoid the microwave, as it will make the breading soft and rubbery.
Conclusion
Baked Chicken Katsu proves that you do not need a deep fryer to enjoy restaurant-quality Japanese cuisine. By pre-toasting your breadcrumbs and using an oven-safe rack, you create a meal that is both healthy and indulgent. Serve it with a crisp salad and warm rice for a balanced weeknight dinner that the whole family will love.
The Recipe
Print
Chicken Katsu
- Total Time: 35 min
- Yield: 4 servings 1x
- Diet: High-Protein
Description
A healthier, oven-baked version of the Japanese classic with a perfectly golden, crispy panko crust and juicy chicken breast.
Ingredients
4 chicken breast cutlets
3/4 teaspoon kosher salt (divided)
1/4 teaspoon ground black pepper
2 tablespoons unsalted butter
1 cup panko breadcrumbs
1/4 cup white whole wheat flour or all-purpose flour
1 large egg
Nonstick olive oil spray
Tonkatsu sauce
Finely shredded cabbage
Lemon wedges
Cooked white or brown rice
Instructions
- Preheat oven to 425 degrees F and place rack in upper third. Line a baking sheet with parchment and an oven-safe rack.
- Pound chicken to 1/2-inch thickness. Season with 1/2 tsp salt and pepper.
- Melt butter in a skillet over medium heat. Toast panko and remaining salt for 2 minutes until golden brown; move to a bowl.
- Set up flour in one bowl and beaten egg in another.
- Dredge chicken in flour, dip in egg, then press into toasted panko.
- Place on the wire rack and mist with oil spray.
- Bake for 12-14 minutes until internal temperature reaches 165 degrees F.
- Rest for 5 minutes before slicing. Serve with cabbage, rice, and tonkatsu sauce.
Notes
- Resting the chicken is crucial for moisture retention.
- Ensure the oven-safe rack is well-greased to prevent sticking.
- Prep Time: 15 min
- Cook Time: 15 min
- Category: Main Course
- Method: Baking
- Cuisine: Japanese
Nutrition
- Serving Size: 1 cutlet
- Calories: 344 kcal
- Sugar: 1 g
- Sodium: 450 mg
- Fat: 12 g
- Saturated Fat: 5 g
- Unsaturated Fat: 7 g
- Trans Fat: 0 g
- Carbohydrates: 16 g
- Fiber: 1 g
- Protein: 41 g
- Cholesterol: 115 mg